Back in the days when Ubuntu was still know as a "Debian based" Linux distro, installing it in dual boot in a computer with Windows already installed used to be pretty difficult.
On top of the setup conundrum, these systems used to be all MBR based systems where you were limited to only 4 primary partitions. If you needed more, you were needed to partition the last partition into separate logical partition.
Obviously with time, just like everything 32-bit moved to 64-bit, the world quietly moved from MBR to UEFI based systems which mainly worked on GPT. MBR remained as a legacy support option. Windows being the largest consumer OS in the market, moved their whole stack to this GPT, and can now only be installed in that way. MBR is officially out.
Setting up my personal computer
I had to replace my HDD in my computer. After installing the new one, I decided to setup the usual dual-boot I used to have, just this time in with Windows 10, which installs only in UEFI. But once the Windows was set up. My UEFI bootable pendrive won't even go to the setup screen. It was just showing "Error parsing PCC subspaces from PCCT" and would abort the process.
Turns out this is a classic issue from the BIOS side and the methods BIOS makers adopt to retain legacy support for the OSs trying to be installed in BIOS mode. This type of issue would be lower and lower with time, until then this would be relevant to know why your bootable drive would be detected by the BIOS, but the installation won't go through. I finally solved the issue and set my linux distro up in UEFI mode.
If you are having the same problem as mine, you might want to follow the same process. This would differ a little depending on your BIOS, and where it puts it's settings, but overall the concept would be quite similar.
Make bootable USB drive with Rufus
- Download Rufus
- Make bootable drive with "Partition scheme and target system type" set as "GPT partition scheme for UEFI". The Rufus window should look similar to this:
Notice the Red and Green marked areas, select them properly and point the proper ISO of your linux distro. - Hit START and wait until it shows ready as shown in the image above.
- Congratulations! You now have a bootable disk.
Setting up BIOS
Now you need to restart your PC and get into BIOS settings.
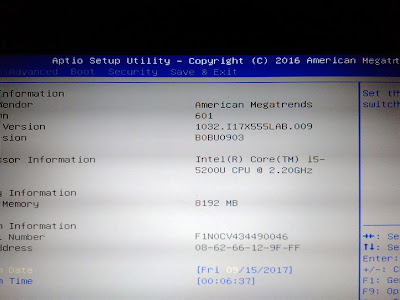
I use an ASUS X555LA, and I need to hit F2 at bootup time to access it. Your's might vary.
So once you're in the BIOS settings the screen would kinda look like this:
When you hover over legacy support enable/disable selection, you might see some tool-tips on the side. Mine looked like this:
So once you're in the BIOS settings the screen would kinda look like this:
Now comes the real understanding, that you need to disable USB legacy support. The idea is, the moment you enable legacy support, your USB drive will only be read in BIOS mode, not UEFI.
My laptop goes as you can see here:
 |  |
Save and exit the bios config. Restart the computer and boot from the USB drive - UEFI option.
For my BIOS, I can select it directly, like this:
For some other BIOS, it might be that you need to setup the boot order in order to boot from that particular drive.
And TADA!
The linux installation starts.
Choose your preferred setup method there, and select the bootloader location as /dev/sda(or the root of the device tree for your HDD). Modern distros are smart enough to detect where your existing bootloader is installed, and will make change to that EFI partition only, you don't have to do anything at all.


0 comments:
Post a Comment
Please let me know your thoughts